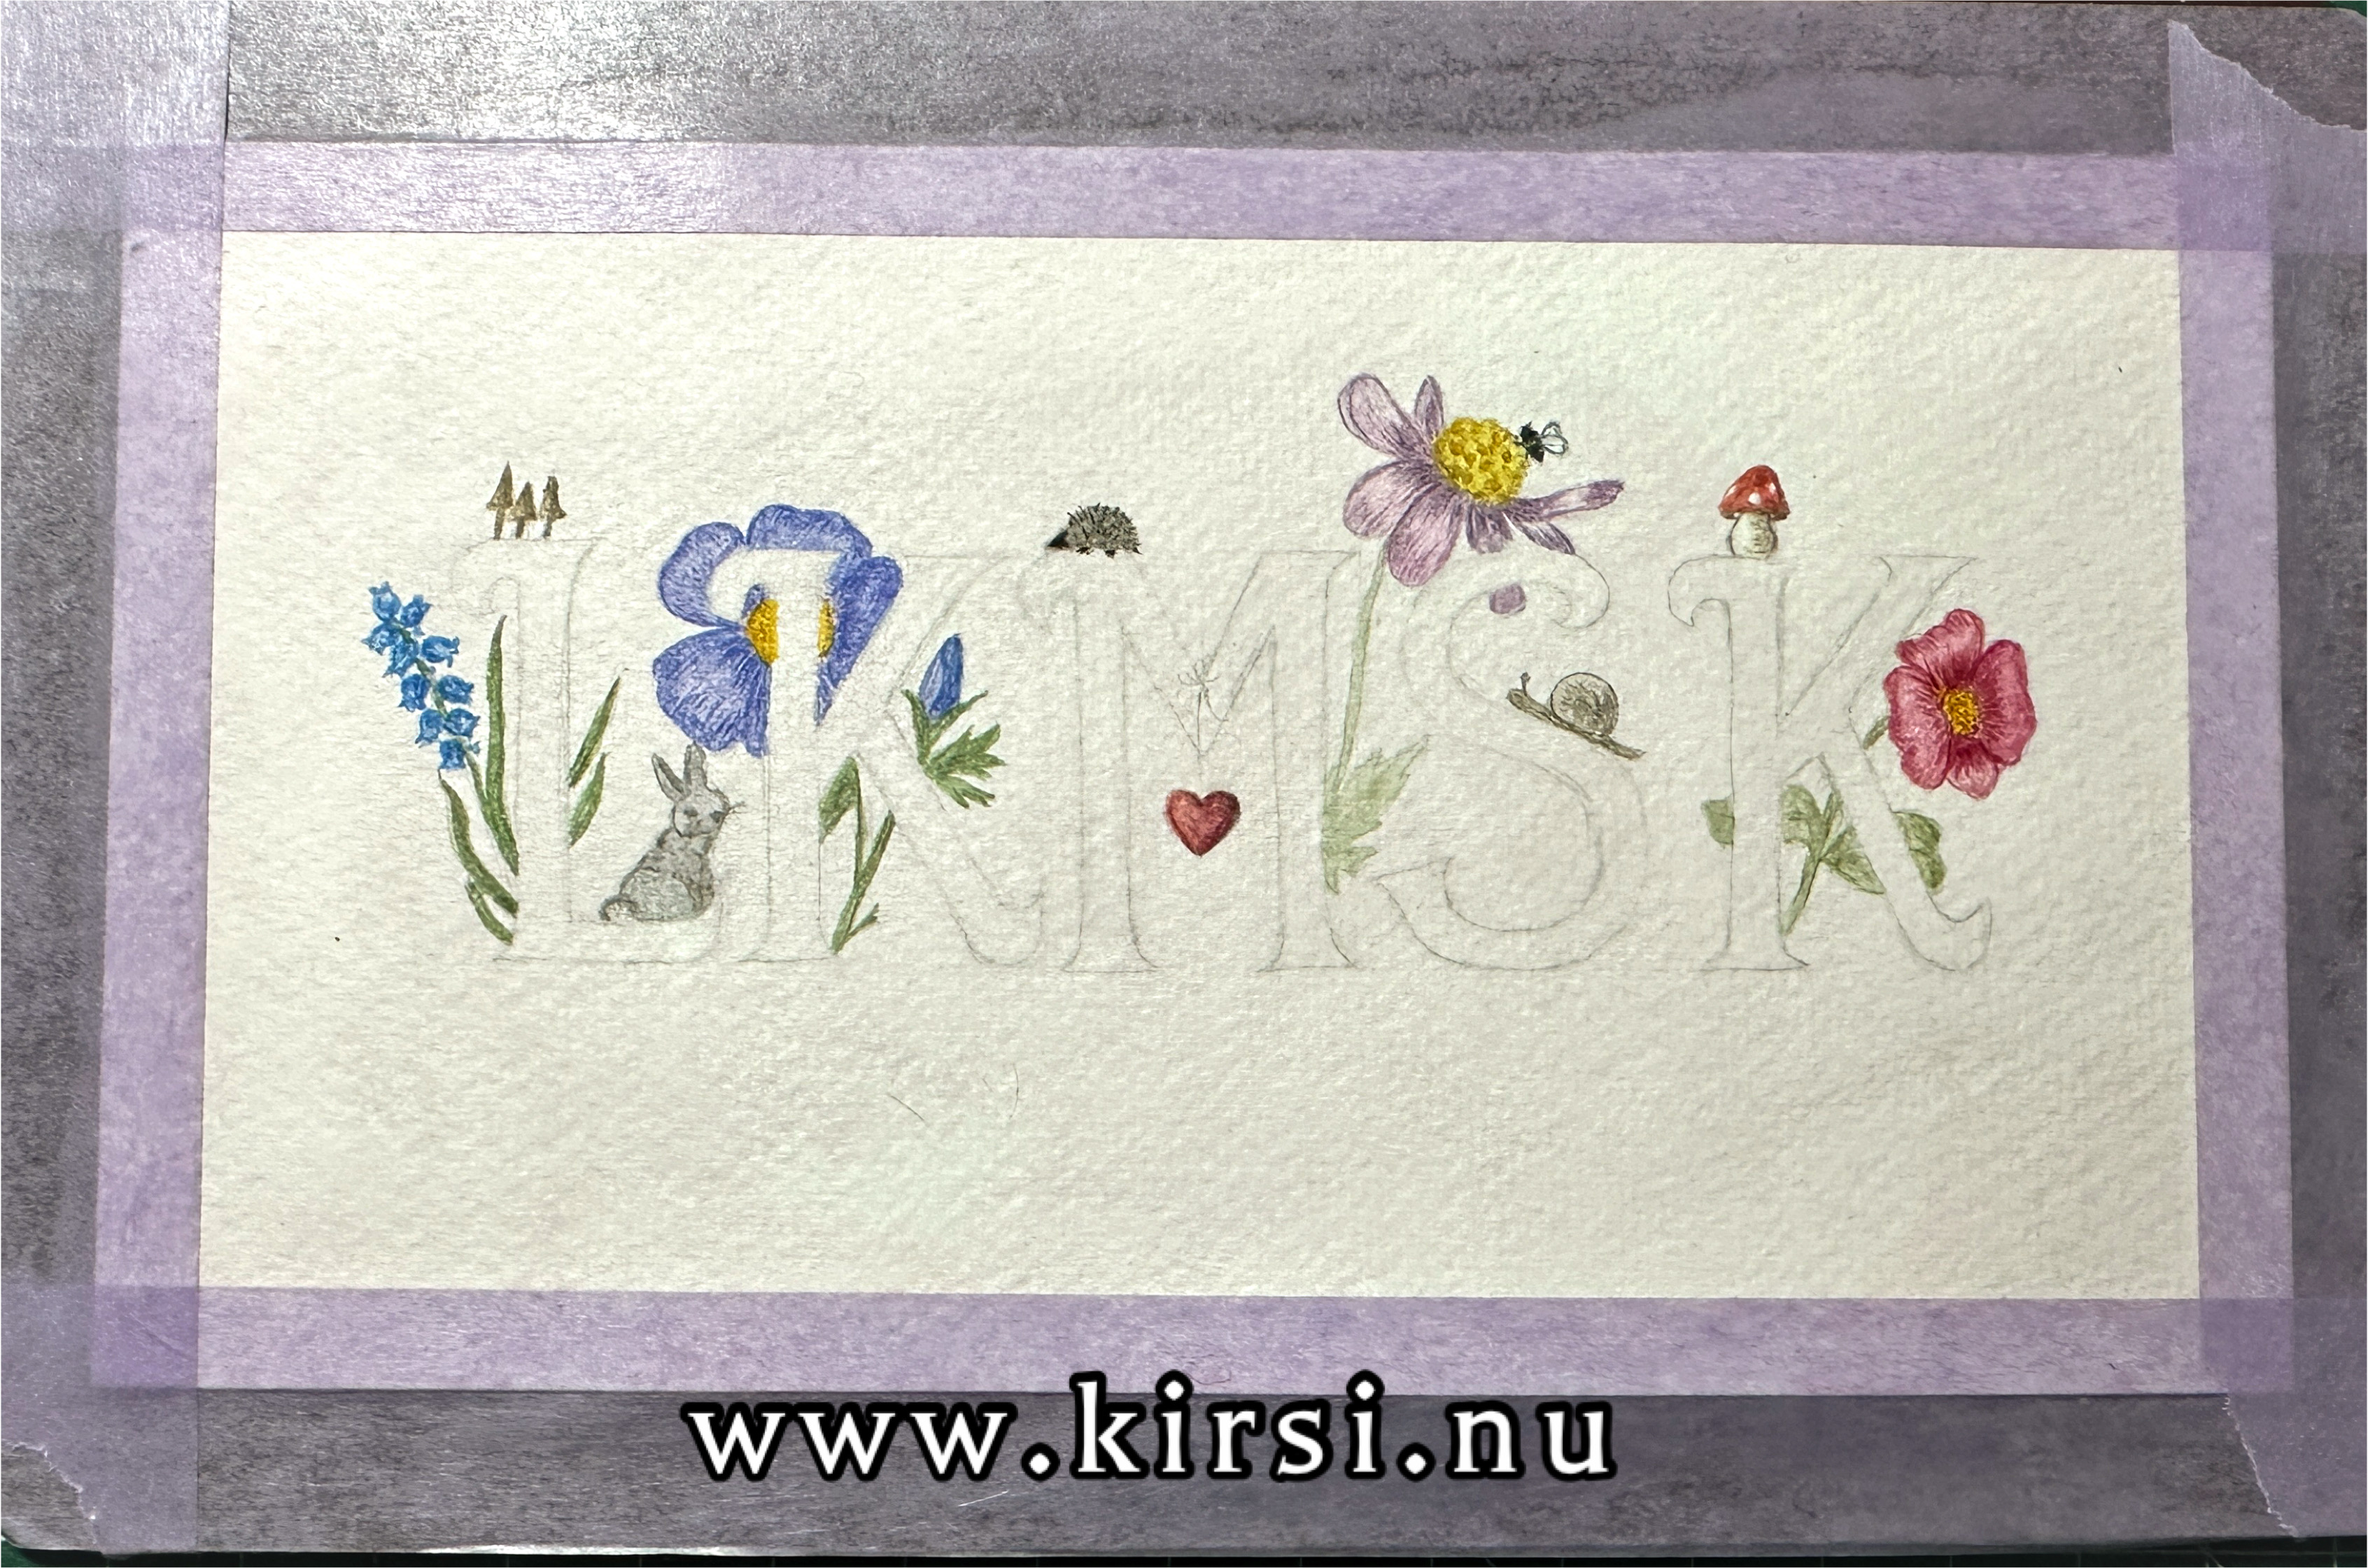
Visar inlägg med etikett art. Visa alla inlägg

onsdag 31 maj 2023

Artsy.

 Artsy.


Detta kort har lite konstnärligt tema.
Tjejen som är mottagare till detta kort är en duktig illustratör och vill studera mer för att bli ännu bättre. Så beställaren önskade korttema med pennor, färg mm.
***

This birthday card has an artsy theme.
The girl who is the recipient of this card is great illustrator and wants to studie more to be even greater. So the client wished for a card theme with pens, colours mm.


Kortbas i grått och svarta panelerna CS, alla är från Reprint.
***

Card base in grey and the three panels CS, all are from Paper Accents.


Jag ritade pennorna. Ja allihopa för hand.
Jag visste inte först om jag skulle ha dem enfärgade men jag valde flera för att ge kortet en färgklick. Svart Copic runt om på varje penna innan jag skar ut dem.

Olika längder på pennorna - skär dem när de är fastlimmade.
***

I drew the pens. Yes everyone by hand. 
I didn´t know at first if I would make them just in one colour but I chose several to give the card a splash of colour. Black Copic around every pen before I cut them out.

Different lengths on the pens - cutting them when they are glued on.


Till framsidan, under pennorna, tog jag två cirklar i olika dimensioner.
Färglade dem båda i Copic 110 - dom var utstansade i slät vit CS.

Efter limmat dem på den svarta paneldelen färglade jag också utrymmet mellan cirklarna gav lite djup.
***

For the front, underneath the pens, I took two circles in two different dimension.
Coloured them both with Copic 110 - they were punched out on plain white CS. 

After gluing them on the plack panel piece I coloured the space between the circles as well. gave a bit of a depth.


Och sen limmade jag på alla pennorna och skar av dem.
Alla pennändar fick lite svart Copic för att dölja den vita kanten.
***

And then I glued on all the pens and cut them.
All the pen ends got some black Copic to hide the white edge.


Numren till framsidan är handgjorda.
Färglade dem med samma orange och midnattsblå som några av pennorna (de två neråt till höger på bilden ovan).
***

Numbers for the front are handmade.
Coloured with same orange and midnight blue as some of the pens (the two on the lower right in the picture above).


På insidan gjorde jag en färgstänk detalj.
***

For the inside I made a colour splash detail.


Text handskriven och min design.
En penna i hörnet och även en på baksidan ovanpå min etikett.
***

Text handmade and my design.
One pen in the corner and also one on the back above my label.

Beep beep. /K

onsdag 9 juni 2021

Coolaste Studenten - The Coolest Student.

Coolaste Studenten -The Coolest Student.


Fritt temaval och ett studentkort.
Möjligheterna är oändliga och samtidigt ska det passa för just det ändamålet.
Ett kort till en ung student som kliver ut med vita hatten på. Som studerat på estetiska linjen Serieteckning och Illustration. 

Kände direkt att det grafiska är ett måste och serieteckning - hur kul är inte det att få testa på lite!
Så här blev det.
***

Free theme choice and a Graduation card.
The possibilities are endless and at the same time it has to suit for that purpose. 
A card for a young graduate student stepping out with the white Graduation cap on. Who´s studied the Art program Comic (Cartoon) drawing and Illustration.

Felt right away that the graphic is a must and comic drawing - how fun wouldn´t that be to try.
This is how it turned out.


Jag ville att det skulle vara stilrent och inte för mycket men samtidigt färgstarkt och annorlunda.
Så det första jag skapade var den vita stora texten på framsidan - Den coolaste studenten.
Ja den är handgjord. Nej det är ingen dies.

Varför gör jag sådana här saker?
Det är för att jag har en vision och oftast kan jag inte hitta dies eller saker som jag vill ha och behöver.
Så, för mig, är det enklare att skapa det jag behöver.
Ja det tar en hel del tid och går det minsta fel får jag börja om, men det är värt det.

Jag gjorde texten i Affinity Photo, skrev ut på printpapper och fäste den på slät vit CS med lite tejp (noga med att inte skada ytan) och skar ut den med min skalpell.

***

I wanted it to be clean and not too much but at the sam time colorful and different.
So the first thing I did was the big white text on the front - the coolest Graduate.
Yes it´s handmade. No not a dies.

Why I make stuff like this?
 It´s  beacuse I have a vision and often I can´t find dies or things I want and need. 
So, for me,  it´s easier to make what I need.
Yes it takes a lot of time and if it goes just a tad bit wrong I have to remake it , but it´s worth it. 

 I made the text in Affinity Photo, printed it out on printing paper and then put it on white plain CS with small bit of sticky tape ( careful not making any damage on the surface) and cut it out with my scalpel.


Efter att jag skurit ut den embossade jag med Silver Satin Pearl pulver två gånger för slät yta.
***

After I cut it out I embossed it with Silver Satin Pearl powder twice for a smooth surface.


Kortbas CS White från Bazzill.
***

Card base CS White from Bazzill.


Ramen till framsidan.
Mycket mätande och ommätande för att få till formen jag ville ha.
Varje tun linje inklusive ramen runt är 1 cm bred.
Jag ville att det skulle ha en konstkänsla och utseende som ett blad ur en seriemagasin.
***

 The frame for the front.
A lot of measuring and redoing it to get the form I wanted. Every thin line including outer line are 1cm wide. I wanted it to have a slightly artsy feeling and a comic magazine sheet look. 


Cardstockrester var perfekt att använda till färggranna paneler. Distressade rätt grovt för att skapa en djup-effekt. Ni kan se på baksidan rätta färgerna där alla delarna är fastlimmade.
***

Cardstock left overs where perfect to use for colourful panels. Distresssed the edges quite roughly to create a deep- effect. You can see the right colours  on the backside where all pieces are glued on.


Sen limmade jag på texten på backgrundpanelen.
***

Then I glued on the text on the background panel.


 Dags för detaljerna.
Jag hade olika idéer  om det men jag valde pratbubblor för att hålla det stilrent.
Ritade, färglade, skar ut och satte ihop allt på kortbasen.
***

Time for the  details.
I hade different ideas about them but I chose speak bubbles to keep a cleaner look.
Drew, coloured, cut out and put it all together on the card base.


Till insidan gjorde jag en pratbubbla, två stycken ljudeffekter och en studentmössa. 
***

For the inside I made one speak bubble, two sound effects and a Student cap.


Det är så här insidan blev.
Placerade allt text nertill och lämnade övre delen tom då önskemålet var att få lite plats att skriva.
***

This is how the inside turned out.
Placed all text on the lower piece and left the upper empty as there was a request for space to write.


The text is a ryhm so the translation won´t sound that good but it basically says:

Computer, paper, pens and inspiration.
Semester with knowledge of wide variety.

Both in the ordinary theoretical
and in the fantastic creative aesthetics.

After many approved tasks 
you are now finally a Graduate!

 GRATULATIONS..


Beep beep / K

Birdy.

 Birdy. Skapade detta söta födelsedagskort till min farbror. Detta är gjort med akvarellfärger. *** Created this cute birthday card for my u...